CHDK, Modification to enhance your camera (Canon)

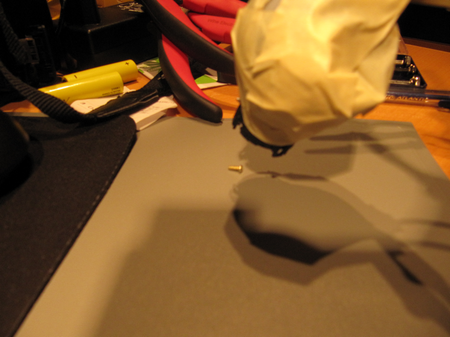
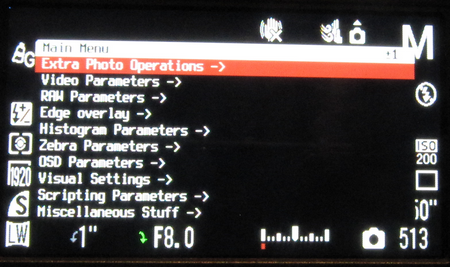
Canon Hack Development Kit, CHDK, makes it possible to enhance Canon Powershot cameras without replacing the firmware. It can be loaded from SD, in camera first press <alt> button and then menu, see picture below.

chdk-photo-settings

Good place to start: CHDK in Brief

CHDK is a firmware enhancement that operates on a number of Canon Cameras. CHDK gets loaded into your camera’s memory upon bootup (either manually or automatically). It provides additional functionality beyond that currently provided by the native camera firmware.

CHDK is not a permanent firmware upgrade: you decide how it is loaded (manually or automatically) and you can always easily remove it.

Good:

  • Scripts
  • RAW format (DNG)
  • Motion detection
  • Longer or shorter shutter speed possible

Bad:

  • Scattered Instructions
    • each camera is different and can have several revisions
    • different loading methods

Canon Powershot SX1

I have used CHDK with SX1. There is CHDK page for SX1. CHDK worked well with “Bootable SD Card Method“. SD card was 4GB, and FAT16. In SX1, the <alt> is the print button.

  • Download was the “sx1-200h-1.1.0-2508-full_BETA.zip” at the downloads page.
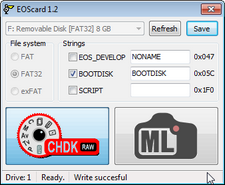
  • Make SD bootable. CardTricks can be used for 4GB SD cards. EOSCard is good alternative since it can be used for bigger cards with FAT32 as well, but unfortunately does not work for my SX1. Therefore another tool is used for SX1.

chdk-bootable-SD

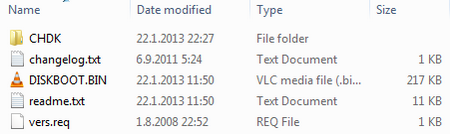
  • For 4GB card, files can be extracted into SD root directory: chdk-extract-files
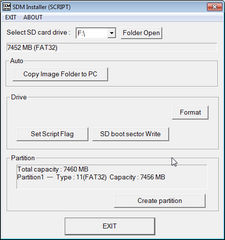
    • For 8GB card, one have to create 2 partitions in SD card (instructions), for example by using SDM Installer. The screenshot below shows that the original SD card had 8GB FAT32.

chdk-create-partitions1

The extracted files are mainly on the FAT32 partition. Only the file “DISKBOOT.BIN” should be in FAT16 partition.

  • Remember to change the SD card lock switch to “Lock”, before putting it into camera.
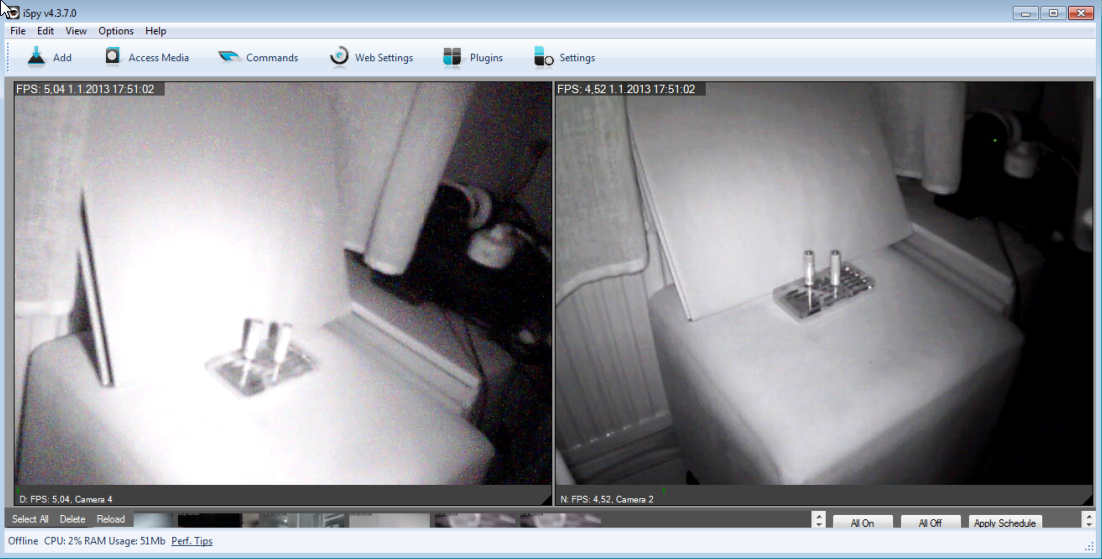
Screenshots

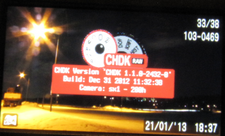
Flash screen after power on:

chdk-booting-flash-messge

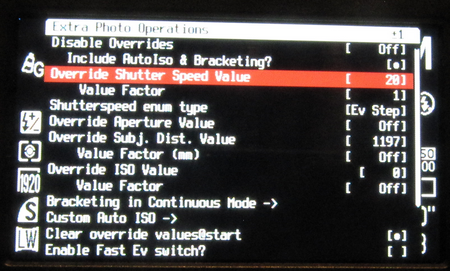
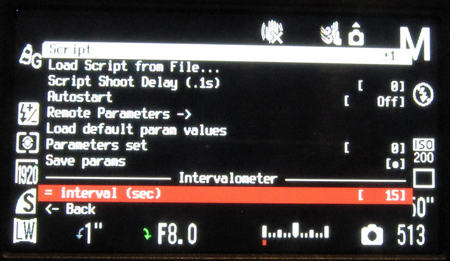
Setting the shutter speed for 20 sec

chdk-20-sec-setting

Selecting the script, file “INTERVAL.BAS”, for execution:

chdk-select-script

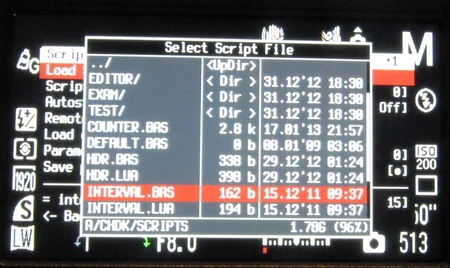
Providing value for the input parameter “Interval” in the Intervalometer script:

chdk-set-script-parameters

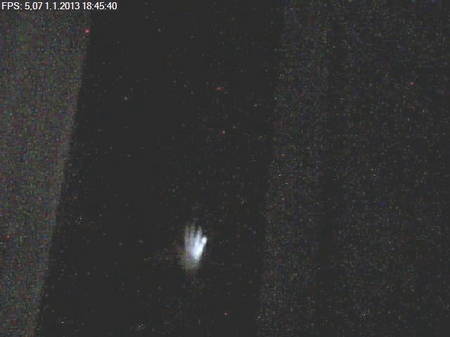
Some photos using camera enhancements

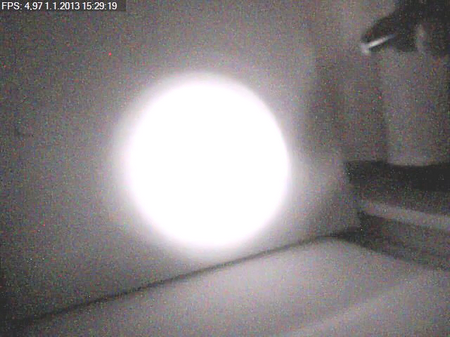
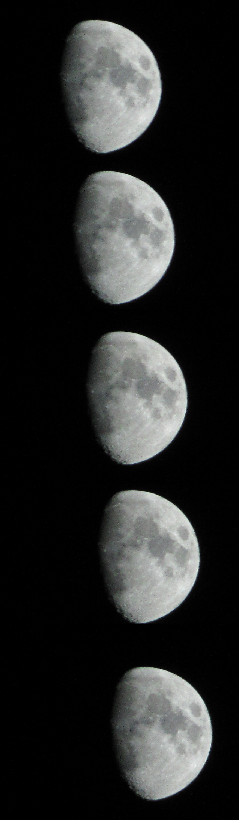
Series of photos of Moon taken by intervalometer script. (Photos are overlayed into same picture manually). (20 times zoom used in SX1)

sx1-moon

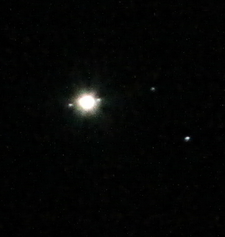
Using the same intervalometer script and changing shutter speed to 1 sec, some jupiter photos were taken (here only the first one shown).

sx1-jupiter

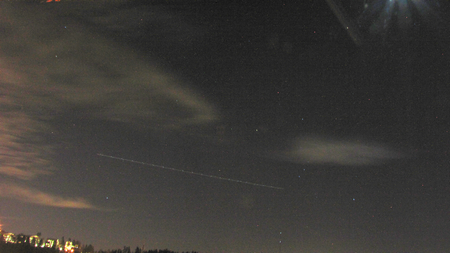
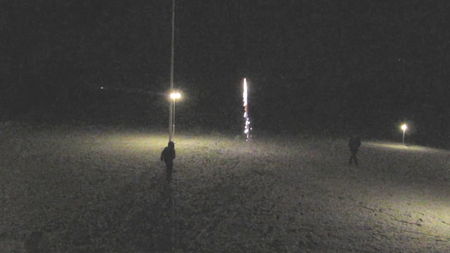
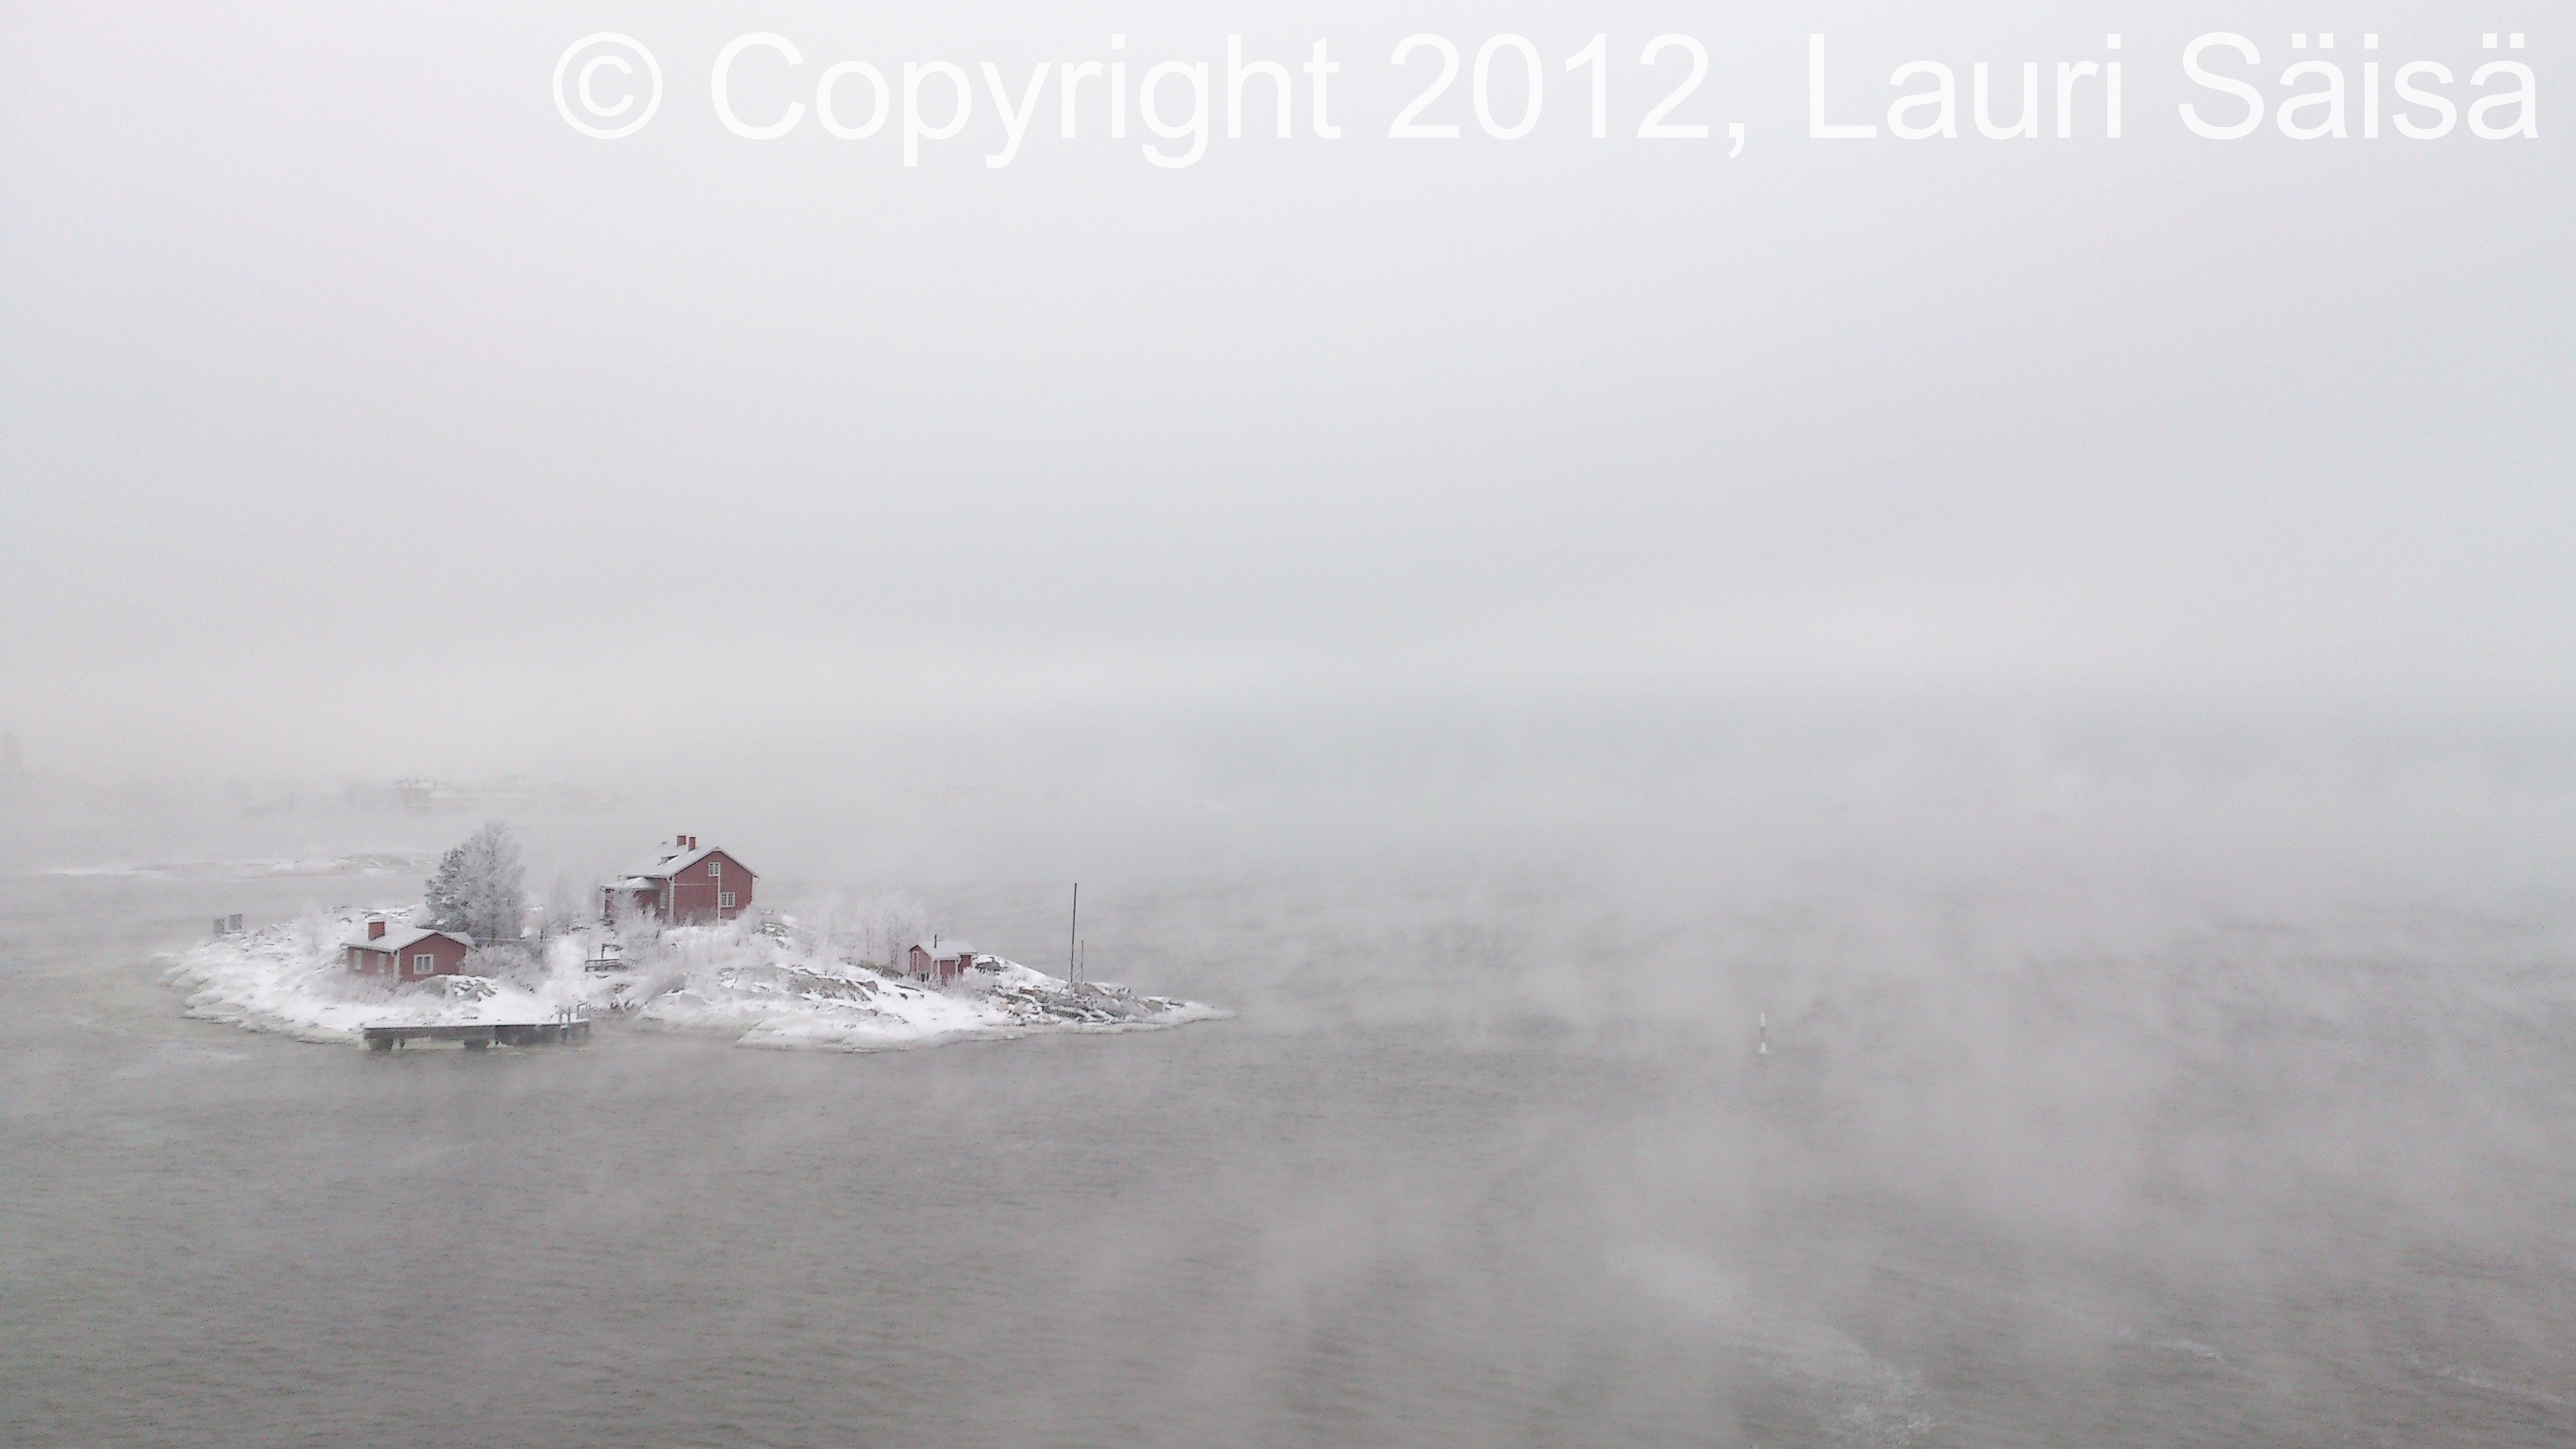
Using long exposure time towards orion, a light trace left by aeroplane is clearly visible (colors are adjusted for better visibility).

sx-orion-and-plane-adjusted

Posted in Anvanced Tools, Audio and Video, Hobbies and Other Interests, Recommended Free Tools | Comments Off on CHDK, Modification to enhance your camera (Canon)

EclipseCrossword, Tool for creating crossword puzzles for training or for fun

EclipseCrossword is one of the crossword creating tools available. It can be usefull as part of the training, for example during security awareness training. Or for creating a monthly competition…

eclipsecrossword1

Good:

  • Can import your clues and answers text file (csv)
  • output to printer, html, RTF, WMF
  • can create interactive web page

Bad:

  • output to WMF is not good (way around: use HTML, EPS, or PDF)

I have used it to create a 100 words Security crossword. The layout creating went smoothly, and after few attempts a satisfactory layout was created (see below). Actually more time was spend on selecting the “words and their clues” than on the tool.

sec100f

Example

A simple example with 10 words is show below.

eclipsecrossword-example1

Clues:

  • Across
    • 4. capability of resisting attack (7)
    • 6. to retrace one’s course (9)
    • 7. the quality or state of being impossible to know (9)
    • 8. degree of excellence (7)
    • 10. state of being fully developed (8)
  • Down
    • 1. not clearly seen (7)
    • 2. fully grown and developed (6)
    • 3. precautionary measure (9)
    • 5. free from fear (8)
    • 9. something that may cause harm (6)

The content of the input file “test10.csv” is shown below. Clues and words are from Merriam-Webster.

security;state of being secure
safeguard;precautionary measure
backtrack;to retrace one's course 
defense;capability of resisting attack 
mature;fully grown and developed
maturity;state of being fully developed
obscure;not clearly seen
obscurity;the quality or state of being impossible to know
threat;something that may cause harm
quality;degree of excellence

Other outputs from the EclipseCrossword tool:

  • The interactive example is here.
  • The answers are here.
Posted in Anvanced Tools, Hobbies and Other Interests, Recommended Free Tools, Security Training, Awareness and Reports, Tips | Comments Off on EclipseCrossword, Tool for creating crossword puzzles for training or for fun

LTE and related protocols overview

LTE specifications are maintained by 3GPP. For a quick start, luckily Master Telecom Faster contains good (and free) material for refreshing your LTE knowledge. And is referred from 3GPP tutorial page as well.

Worth to have a look at:

R8 dedicated pages

The same information is available also at Master LTE Faster site.

The links to free pages (videos, links) at that site are:

Links

Posted in ICT Standards, ICT Training and Courses | Comments Off on LTE and related protocols overview

Test, DIY webcam microscope

I happened to have 2 broken gadgets: a webcam with broken optics but with working sensor, and a digital pocket camera with working optics but with broken electricity. The question was that what happens when changing the optics of the webcam? Can you make DIY (Do It Yourself) microscope?

Needed parts:

  • webcam
  • additional lens(es)

The parts used in this test: logitech webcam which was missing lens, and 2 lenses from olympus digital camera. The 2 magnifying lenses in the olympus original optic’s frame were fixed as close as possible to webcam sensor. (Other frame components and 1 lens were not used).

The result was not pretty, since I did not have suitable glue available, see below…

microscope3


Calibration

The scales are used to get an estimation on the total viewable area and the scale. The viewable area is almost 4x3mm. The webcam has picture size 640×480 pixels.

The focus distance is about 30 mm.

mikroscope1 mikroscope2

Webcam Screenshot

A support stand was used to keep the webcam steady at fixed distance above table. The focus area is very small, and small changes in positions have big impact on which part is being focussed.

webcam-microscope-screw

Comparison with digital camera macro

The photo below is taken with Canon Powershot SX200 in super macro mode.

webcam-microscope-canon-screw

Links


Summary

While it is possible to make DIY microscope with webcam, it is good to consider the possible support system in order to control the focus.

And perhaps this DIY is not at the same level as cheapest USB microscopes, but doing it can be fun 🙂

Posted in DIY, Gadgets, Hobbies and Other Interests | Comments Off on Test, DIY webcam microscope

Test, convert normal webcam into night vision webcam (infrared)

Many of the webcam contain a IR-filter to block the infrared light from the sensor.

It is possible to turn the webcam into night vision webcam by removing the internal IR-filter and replacing it with “visible light” blocking material.

The night vision here means that the webcam can see targets in the near infrared spectrum (0.75-1.4 µm). Typically the target need to be illuminated with infrared led, if there are no other infrared light sources.

Please note that this is not the same as thermal imaging, where body temperature can be measured without additional illumination. The spectrum is even less energetic (0.9–14 µm) (The camera for thermal imaging is called thermographic camera.)

Removing IR-filter

webcam-nightvision1 webcam-nightvision9
logitech webcam Cover and lens removed

webcam-nightvision2
Sensor is now visible, the IR-filter is connected at the bottom of lens support frame (lying freely on the right).

The IR-filter was glued, and finally I have to break it in order to remove it. Piece of colour negative film was placed in the same place in order to block the visible light. (I’ll replace this setup after obtaining better material, like acrylic glass)

Test with DVD remote control

DVD remote control is an example of consumer IR.

webcam-nightvision6
The setup: modified webcam is looking towards 2 batteries

webcam-nightvision5
In dark room, remote control is pressed, but nothing visible is seen.
Webcam is detecting the IR light, and output is visible in the iSPy tool (on the screen)

webcam-nightvision3
This is one of the webcam screenshots from the iSpy tool.

Test, shape of DVD-remote control IR beam

webcam-nightvision4
The beam shape is circle, and quite wide even at a short distance.

Test, comparison with IP night vision camera

On the left is the modified webcam, on the right is the night vision camera with 5 IR leds.webcam-nightvision8

Test, illuminated IR target behind window

The normal window reflects big part of the IR light. Therefore if using IP night vision camera through a window to look from inside house into outside, the reflected IR light is so strong that one cannot see who or what is behind window. However, if the outside is illuminated with IR led, then cameras today are sensitive enough to see through the window.

webcam-nightvision7
Screenshot from modified webcam, when outside target (hand) behind window is illuminated by dvd remote control.

Links

Make an infra red camera

Webcam filter removal

Posted in Audio and Video, DIY, Hobbies and Other Interests | Comments Off on Test, convert normal webcam into night vision webcam (infrared)

Tip, how to brighten your night videos (new year) by VLC

The VLC media player can be used for more than just playing videos. For example for converting video from one format into another. (Converting video can also be done with XMedia Recode tool.)

But less known is that VLC can also be used for adjusting the light conditions on the video. The example below is a screenshot from a processed video file. The video was recorded with an android phone and originally was mostly black.

vlcsnap-2013-01-02-10h08m37s70

In the VLC, the adjustments can be done in menu Tools->”Effects and Filters” (ctrl-E) -> “Video Effects”. For example, often a slight change is gamma sufficient.

VLC-video-adjustments

However, this is affecting when the video is viewed with VLC player.

In order to make the change permanent, the gamma change can be applied when converting the video. I did not manage to do this via VLC GUI. But with command line this works fine, and can be applied for multiple files at the same time.

Example command file for multiple video files

The example bat file “convert-3gp-and-gamma.bat” will convert all *.3gp files in the directory into *.mp4 files and adjust the gamme at the same time in those mp4 files.

Content of 1-liner “convert-3gp-and-gamma.bat” file:

for %%a in (*.3gp) do cmd /c "C:\Program Files (x86)\VideoLAN\VLC\vlc.exe" -I dummy -vvv %%a --sout #transcode{vfilter=adjust{gamma=2.8},vcodec=h264,vb=0,scale=0,acodec=mp4a,ab=128}:standard{access=file,mux=mp4,dst=%%a.mp4} vlc://quit

Place the file into directory which only contains those 3gp files which you wish to adjust with gamma. Change the content of the file to suit your needs. The bat file can be explained as follows. The first part is the loop over certain files, for %%a in (*.3gp) do command, in this case all 3gp files are selected and for which command is executed. The command is then effectively the vlc.exe, and the rest of the line are parameters for vlc tool.

Note, when running the bat file, the VLC gui will popup for the duration of execution.

Posted in Anvanced Tools, Audio and Video, Tips | Comments Off on Tip, how to brighten your night videos (new year) by VLC

ByteScout Watermarking, tool for adding watermark to your photos

ByteScout Watermarking is freeware for adding watermark into your photos.

Good:

  • Integrated into explorer
  • batch mode
  • sufficient for basic watermarking tasks

Example

  • Original photo

DSC 0181


  • Watermarked photo 1

DSC 0181-watermark1


  • Watermarked photo 2

DSC 0181-watermark2

Posted in Basic Tools, Recommended Free Tools | Comments Off on ByteScout Watermarking, tool for adding watermark to your photos