
Ubuntu Cloud Live image is mentioned at Ubuntu’s site and instructions are given on how to boot the system from USB. This image is nowadays a little outdated (based on Essex release). For more serious experiments, please use more up-to-date release of OpenStack.
However, the live image can work well for the first introduction to the OpenStack concepts like
-
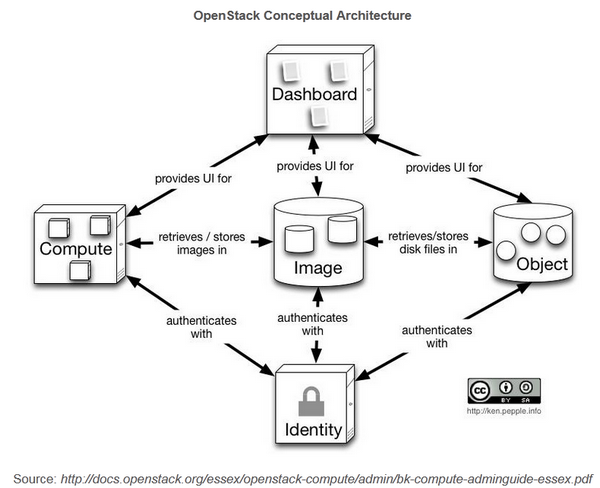
Nova for computing
-
nova-api
-
nova-compute
-
nova-network
-
nova-volume
-
(this was not working on the live image)
-
-
-
Glance for Virtual Disk Images
-
Keystone for Identity and
-
Horizon for web gui (dashboard)
The good side of the live system is that it comes with Openstack software installed. The bad side is that it might be missing some linux components like Openssh server. Since it is a live image, the changes are not permanent. However when using the VirtualBox, one can use snapshots feature to save the work and to continue later. (For portable VirtualBox, see here).
Essex architecture
Step 1. Starting up the OpenStack in VirtualBox
-
Tip: When booting the VM, one can choose the keyboard layout (press Shift/Alt during boot, select F3 keymap)
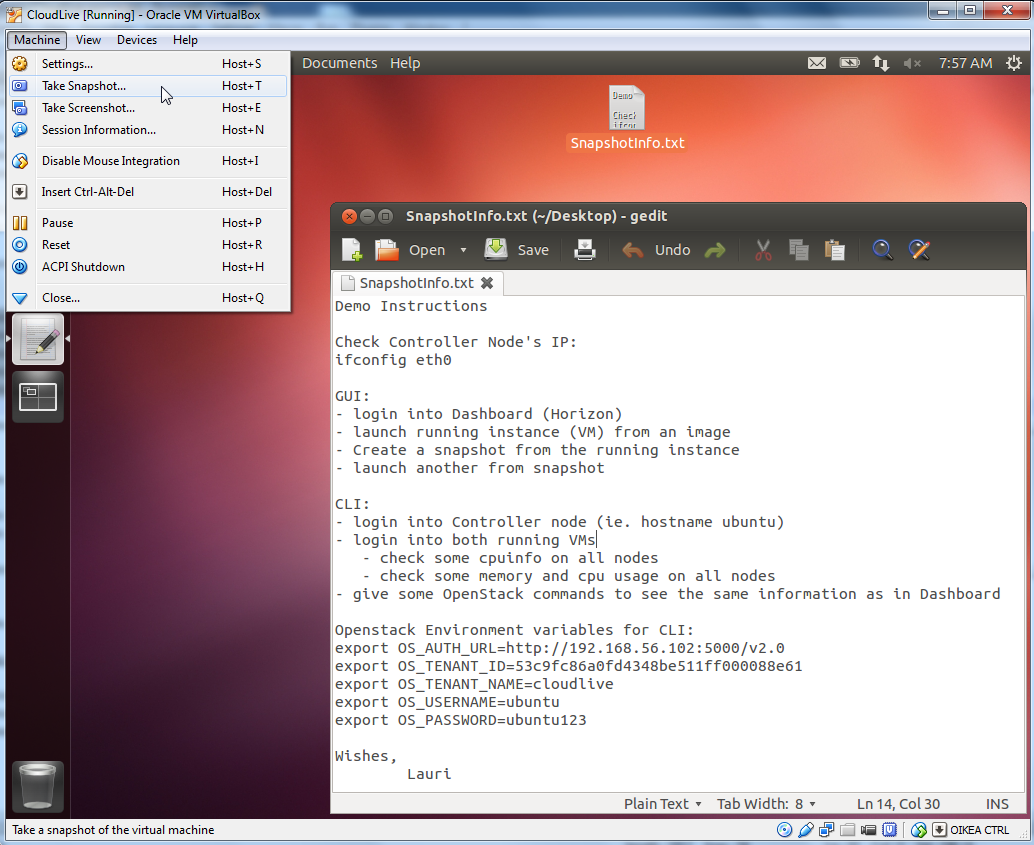
After booting, additional instructions can be found in the GettingStarted.txt document (see figure below)

However, I did not get the clipboard working across the host and guest, and then it can be more convinient to install the ssh sever, and use putty for giving commands from the host.
sudo apt-get install openssh-server
For the situations, where VirtualBox “Host only” networkig is used, one can use offline method to install the openssh-server and ssh-import-id packages.
In order to be able to login remotely, check the IP address and define a password for ubuntu user:
ifconfig eth0
sudo passwd ubuntu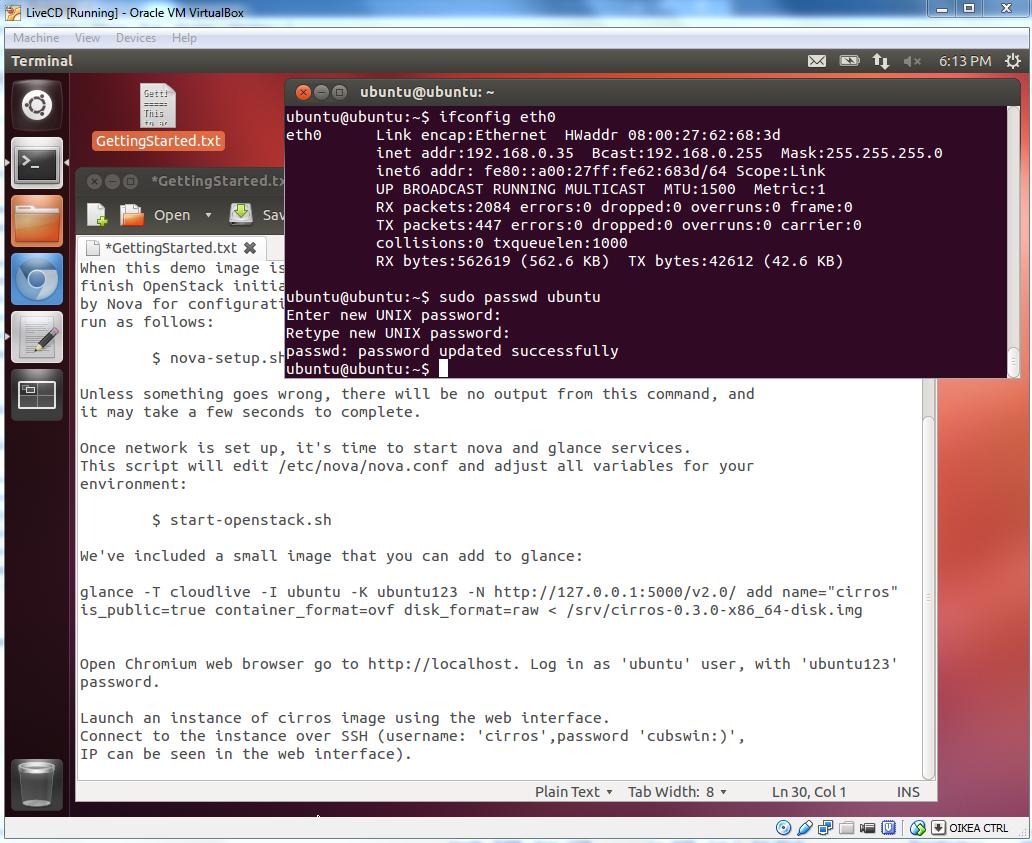
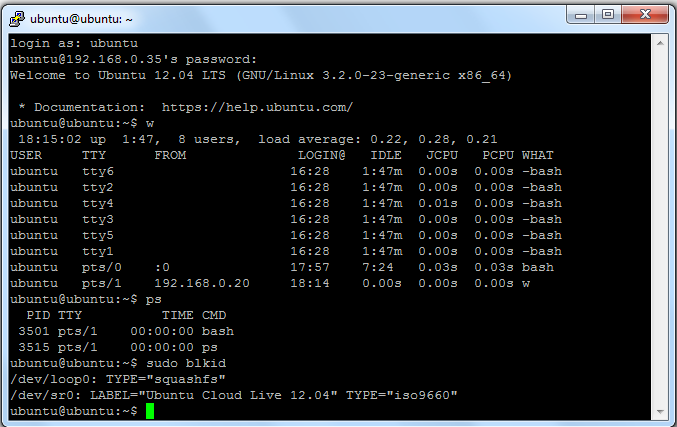
Login via putty
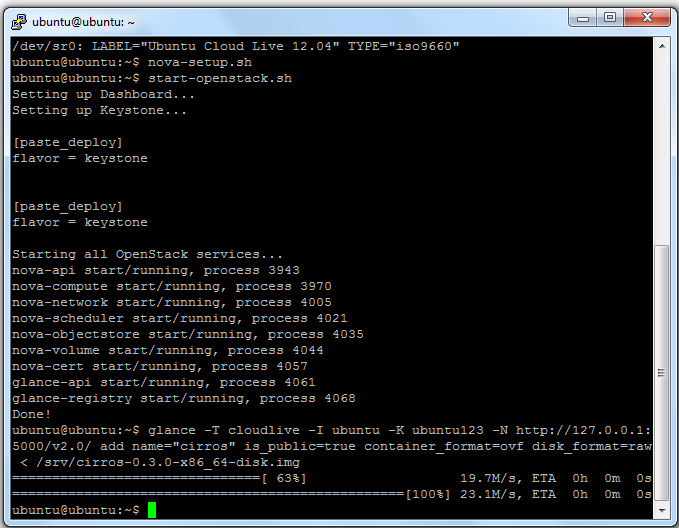
Configure and start the OpenStack, and add a test image called cirros:
nova-setup.sh
start-openstack.sh
glance -T cloudlive -I ubuntu -K ubuntu123 -N http://127.0.0.1:5000/v2.0/ add name=”cirros” is_public=true container_format=ovf disk_format=raw < /srv/cirros-0.3.0-x86_64-disk.img
(for this glance command above, please see the GettingStarted file for correct syntax and format)
Step 2. Login to Horizon (dashboard)
One can use the web browser inside the VirtualBox, or one can also login remotely (depending on VirtualBox configuration).
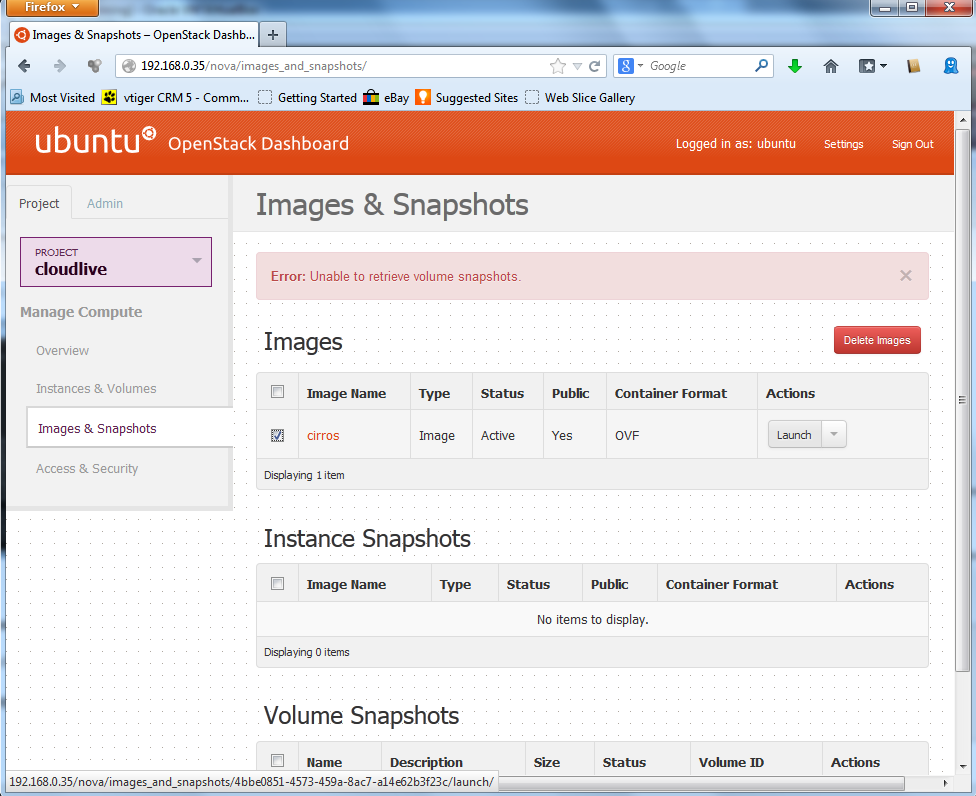
After login, in the project area, lauch instance by using the cirros image
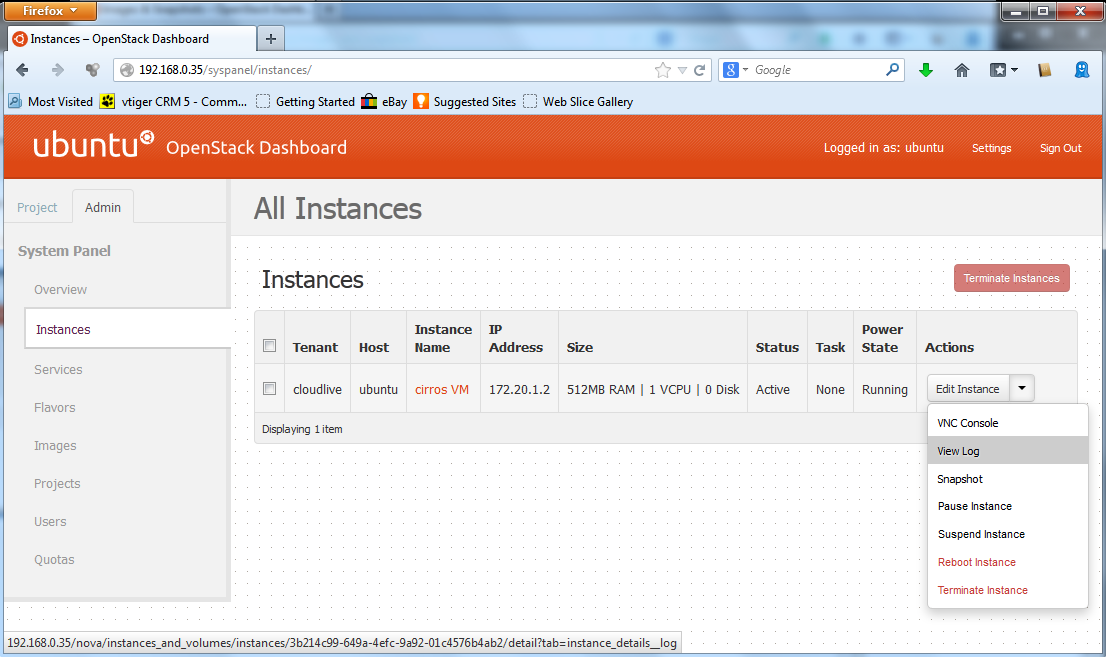
The running instance can be seen also in the admin area
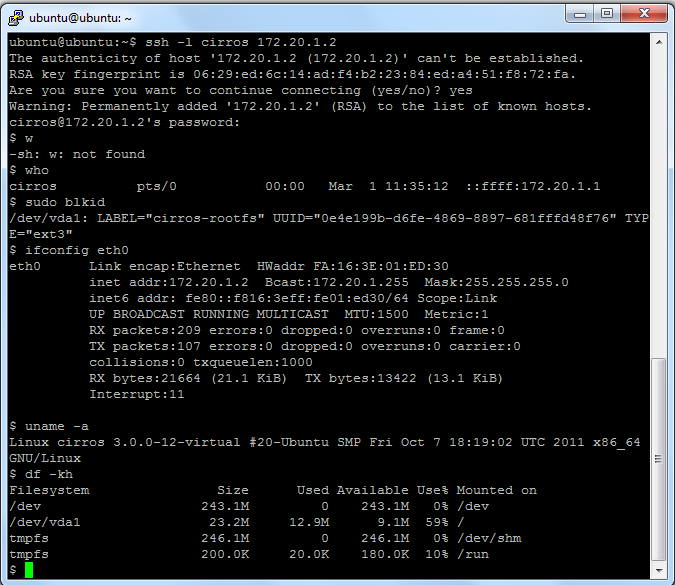
Step 3. Login into new Virtual Machine “cirros”
Using the IP address information (172.20.1.2) in the Horizon, one can login from Controller node (hostname ubuntu) into cirros
Step 4. Setup Command line interface (CLI)
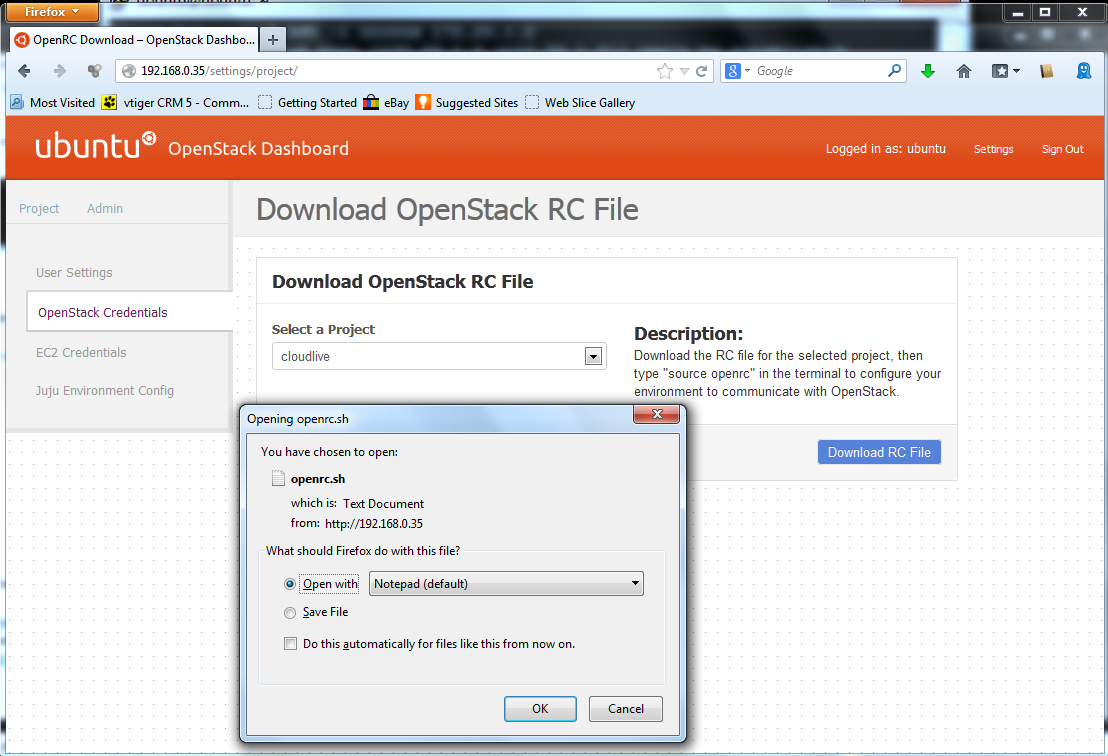
Before one can use CLI effectively, one need to define certain environment variables.
One get the configuration file via the GUI: Choose Settings link, then “OpenStack Credentials” tab, then “Download RC File” button.
Give those commands in the ssh session before executing OpenStack CLI commands
export OS_AUTH_URL=http://192.168.0.35:5000/v2.0
export OS_TENANT_ID=53c9fc86a0fd4348be511ff000088e61
export OS_TENANT_NAME=cloudlive
export OS_USERNAME=ubuntu
export OS_PASSWORD= ubuntu123
(the http link above depends on your configuration)
For example, list the active servers (instances running)
nova list
and look content of nova-setup.sh

One can find the MySql userid and passwrd for nova, and one can see how to admin command nova-manage is used to create an internal network.
the second script start-openstack.sh shows that if virtualization is not supported then qemu is used instead of kvm (ie. command kvm-ok shows that virtualization is not supported). And how the keystone is configured before services are started.
Step 5. Create a VirtualBox snapshot
Step 6. Play around
Test and try various linux and openstack commands! See the links below …
Links to Essex material
-
Beginner’s Guide to OpenStack by 1 Cloud Road
-
-
a very good pdf document with plenty of commands
-
-
-
another good reference of commands on Essex release
-
OpenStack (Essex) Videos
Open Stack Essex: Architecture and Demo Video (6 min)
OpenStack material
-
Logging and Monitoring chapter from OpenStack Operations Guide
Additional
-
For more serious experiments, please use more up-to-date release of OpenStack. The Essex release is nowadays outdated.
-
Please note, that by using UNetbootin to create a bootable USB, one can include the persistance as well. (ie. when not using VirtualBox)