
A tiny touchscreen on portable Raspberry PI (RPI) might be very helpfull for showing sensor values or key performance data like memory, CPU level or disk space left. My intention is to build a portable air quality monitoring tool based on RPI. This monitoring system will be able to show values of temperature, humidity and dust level.
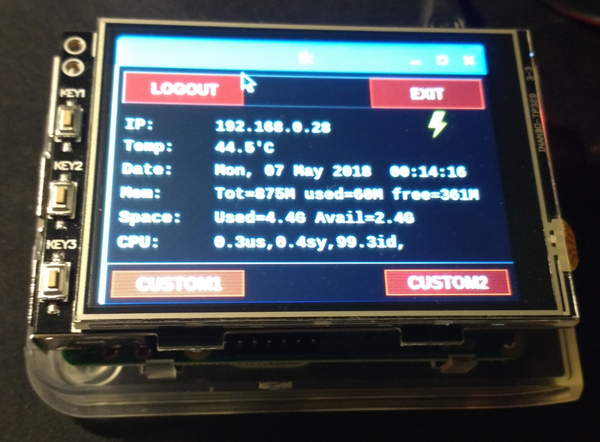
This blog is about the first step, to use the screen for something simple, like showing key performance data. The figure below shows how the 3.2″screen looks like when attached on top of the RPI. I got my TFT Display 3.2 V2 on a good discount on a local computer store 🙂 …
Operating System
First I tried to get the screen working with the current raspbian OS. After some trial and error, I decided to try the manufacturer’s OS image. And as it was working right away, then I continued with that path. Remember to use “sudo raspi-config” command to configure your keyboard, localization, time etc.
One can clean up and remove the unnecessary packages, eg. wolfram-engine, libreoffice, sonic-pi and minecraft.
dpkg --get-selections > packages.txt

dpkg-query -Wf '${Installed-Size}\t${Package}\n' | sort -n > packages-space.txt

sudo apt-get purge wolfram-engine

sudo apt-get clean

sudo apt-get autoremove

sudo apt-get purge libreoffice*

sudo apt-get clean

sudo apt-get autoremove

sudo apt-get purge sonic-pi minecraft-pi

sudo apt-get clean

sudo apt-get autoremove

sudo apt-get purge scratch scratch2 squeak-vm squeak-plugins-scratch

sudo apt-get clean

sudo apt-get autoremove
Link: How To Free Up Some Space On Your Raspbian SD Card? Remove Wolfram & LibreOffice
Text mode in console
At first I tried to use the text mode in console, but this display (with 320×240 pixels) is still too small for anything more serious work. It is better to use the ssh (putty) over wifi to operate anything on command line. However, if you wish to use the text mode, then one can use “sudo raspi-config” to activate booting into text mode. And the font for the console can be set in console-setup file by adding 2 lines, see below (see link).
sudo vi /etc/default/console-setup

FONTFACE="Terminus"

FONTSIZE="6x12"
It is possible to utilize a virtual keyboard (eg. matchbox-keyboard) , and use the mouse for typing (see link). And/or one could simply activate a screensaver called termsaver, which has several utilities like matrix, clock and system monitor.
sudo apt-get install termsaver

termsaver matrix

termsaver clock

termsaver sysmon
Graphic mode in touchscreen
As the goal is to create a portable “low security” gadget for measuring the temperature, then one could easily activiate the windowing mode with automatic login (by using again the famous command “sudo raspi-config”). At reboot, the X-server environment is automatically started. In order to launch your custom script/tool, then one can follow the instructions here, and add the corresponding line in autostart file:
vi /etc/xdg/lxsession/LXDE-pi/autostart

@/usr/bin/python /home/pi/Display/pitkgui-custom.py
Custom start script in the touchscreen
pitkgui script in github was used as a base for the customized script, and it can be modified to provide different performance values to be monitored. The screenshot below shows the output of the customized script (pitkgui-custom.py). (The screenshot is taken with scrot command. One can install it with “sudo apt-get install scrot” command).
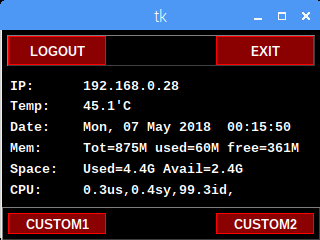
The custom1 and custom2 buttons are still unused, and will be used later for the humidity and dust level sensors. (The 3 hardware buttons outside of the screen could be used by another script…)