
Raspberry Pi is an interesting candidate for a low cost, low power, small and open source based security device to be used at small office or at home office (SOHO), or for protecting your home automation… However, some preconcerns were caused by the fact that the ethernet connection in Raspberry is via USB, as mentioned at wikipedia site.
I chose IPFire for this first test mainly because of the wide toolset that they have:
-
firewall
-
web proxy (squid) with
-
bandwidth management
-
URL filter (SquidGuard)
-
virus scanner (SquidClamAV)
-
-
OpenVPN
-
IDS Intrusion Dection System (snort) with
-
IPS possibility (Guardian)
-
-
Wireless Access Point
-
Dynamic DNS updater
-
several addons
For other security usage, please see the links chapter.
Installation instructions
The installation instructions are quite good. In the pre-requisities section, they list the supported ARM architectures. Note, all Raspberry Pi versions are not supported. I used the latest distribution image for ARM, and decided to give it a try.
These and these instructions has good additional information.
Writing image to microSD
The IPFire image can be written to the microSD via Win32 Disk Imager (portable version works). (On windows 7, I had to close all explorer windows, otherwise there was an error.)
As a result, the microSD card will have 2 partitions: the first one is visible in Windows and is the boot partition, and the second one is in ext4 format. (The files in ext4 can be viewed with a tool like Ext2Read).
Setup
I was aiming for setup, where the RED network is for internet, and GREEN network is for LAN. As IPFire requires at minimum 2 networks, and I added one USB-LAN connector for the second network.
In my case, I do not have HDMI screen, and therefore I needed to modify the config before booting. Luckily the file is accessable on the boot partition.
Optionally one can send the configuration parameters to fireinfo, see figure below for the setup used in this first test.

Installation
Installation went smoothly, and when IPFire booted up, it proceeded for configuration settings.
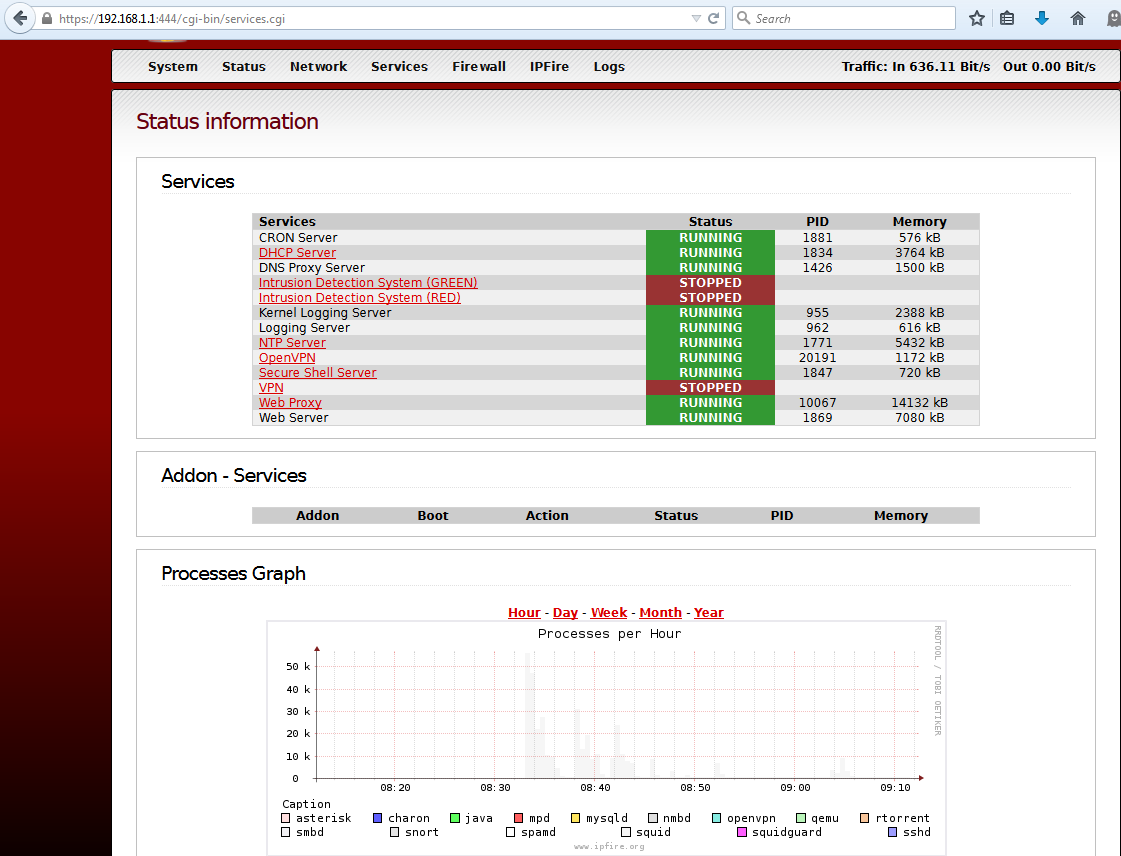
For remote access to OS (from GREEN network), first one need to login to GUI (e.g. https://192.168.1.1:444 from GREEN network), and enable the ssh access and configure parameters.
Results
I was able to start and test that various features did not crash the system. Snort, however, did not work and caused a crash. It seems like a SW revisioning issue. However, this might be solved in future releases.
The other tweaking were related to stopping and starting networking, and also for the first time to give following command as root “/etc/init.d/collectd start” in order to get statistics working. The snort problem also happened at reboots, and it was solved by removing one network cable (GREEN) before starting up. And then temporarily disabling (preventing) snort to come up, so that after booting one could turn snort off in the GUI. After doing this, one could leave the cable connected…
All in all, there might be some use cases for using Raspberry Pi, especially with hobbies and testing. Definitely Raspberry Pi is a low cost platform to get a hands on and learn by doing. And it is very easy and fast to swap the microSD card, and do something else; another project.
However, for office or for anything more serious (availability), a more stable platform would be better for IPFire, like fanless PC or thin client. But again, depending on the use case…
Links
-
- PwnPi, penetration testing
-
Kali, penetration testing (BackTrack)
-
Raspberry Pwn, pentesting suite by Pwnie Express
-
-
many firewalls are for x86 architecture
-
- 10 Useful Open Source Security Firewalls for Linux Systems
- Monitor your LAN with Raspberry Pi
- mentions OSSEC on raspberry